Using a Python virtual environment in Motor-CAD#
You can use a Python virtual environment with Motor-CAD. By default, Motor-CAD uses the Python version that comes with the Motor-CAD installation.
Create a local Python virtual environment#
Note
If you are using a Python IDE, this often creates a virtual environment for you when you start a new project. In this case, you can skip the section below, which describes how to create a virtual environment from the command line.
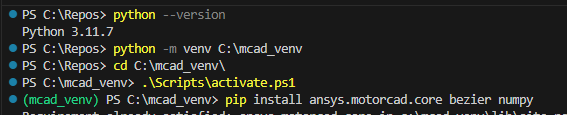
If Python is already installed, you can check the version by running the following command in a terminal. (You can use the Windows terminal or any terminal integrated with an IDE such as Visual Studio Code or PyCharm.)
python --version
Based on the Python version, you create a virtual environment:
python -m venv virtual_environment_folder_location
Activate the newly created virtual environment:
In case of Windows Powershell
.\virtual_environment_folder_location\Scripts\activate.ps1
In case of Windows Command Prompt
.\virtual_environment_folder_location\Scripts\activate.bat
Depending on the terminal specification, the virtual environment name might be highlighted.
Use pip to install all required packages, such as ansys.motorcad.core, numpy or
bezier.
pip install ansys.motorcad.core bezier numpy
In the terminal window, the preceding commands might look like this:
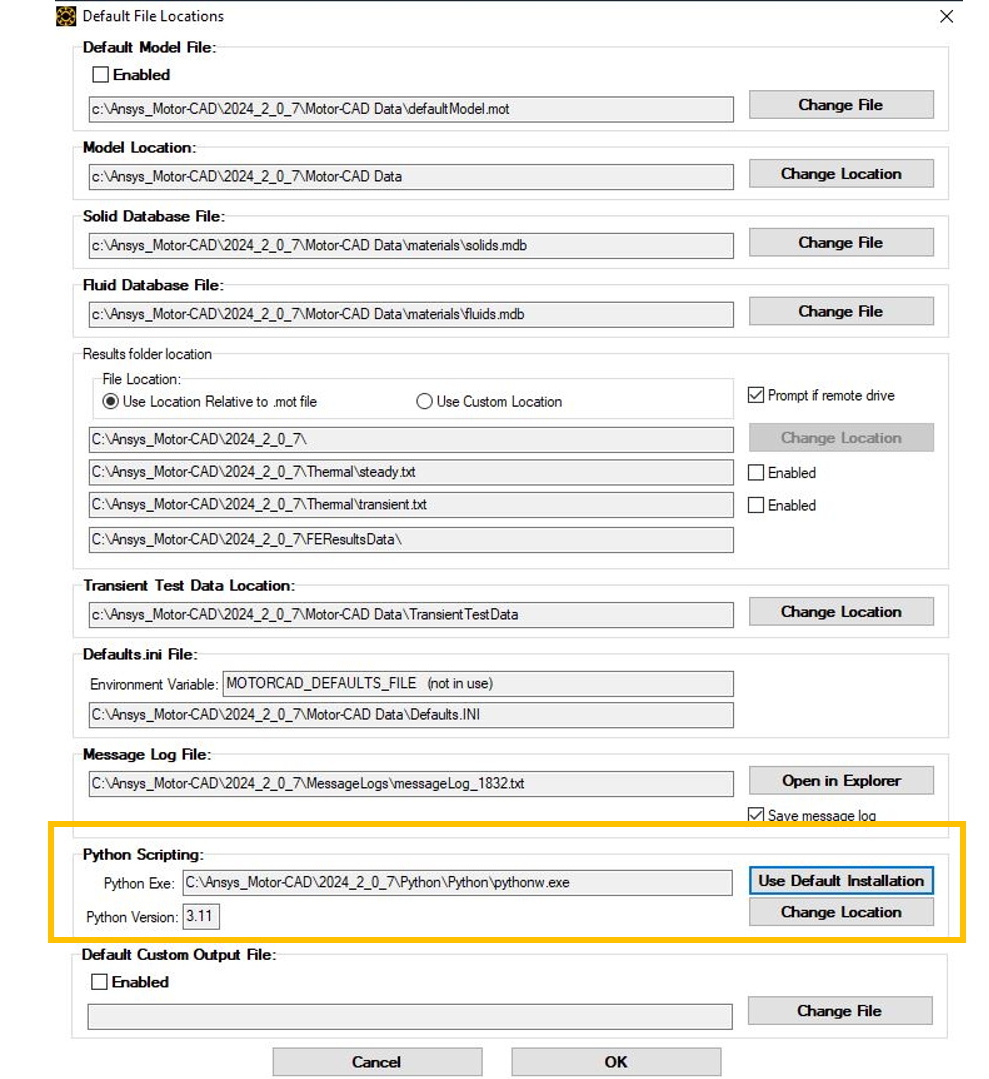
Change the Python exe path in the Motor-CAD UI#
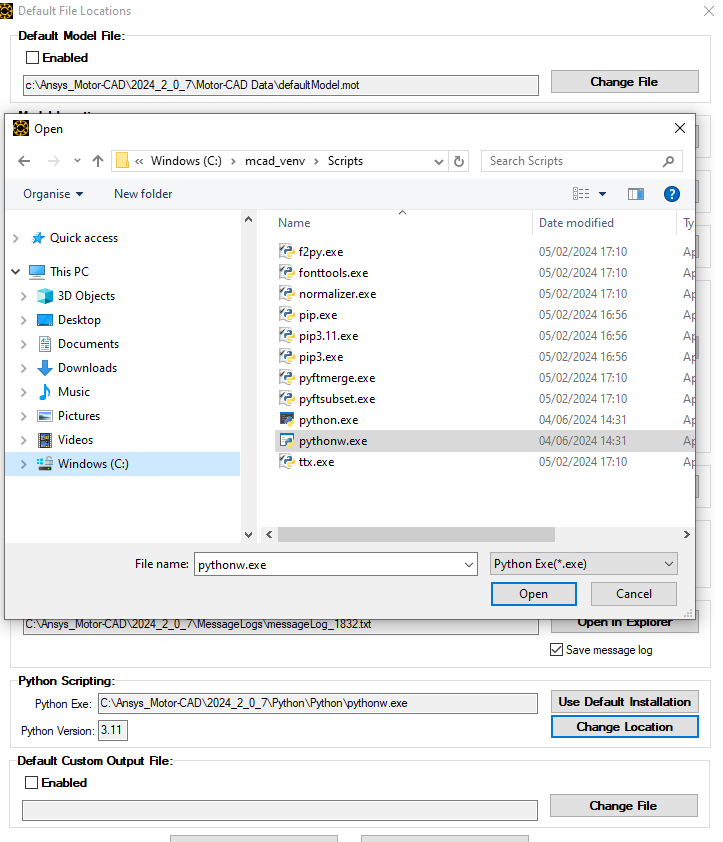
Proceed to change the path for the Python exe in Defaults -> Default File Locations. This should
point to the pythonw.exe file in the Scripts folder of the virtual environment:
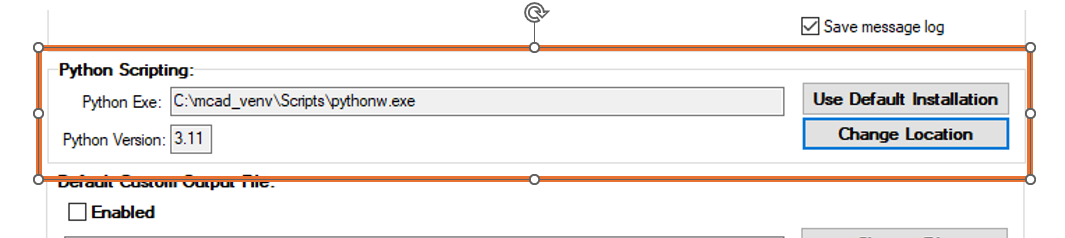
The Python path is updated accordingly, and the Python version is recognised by the Motor-CAD UI.