Note
Go to the end to download the full example code.
Custom Magnet Angles for SPM#
This script applies the adaptive templates functionality to modify magnet angles in a Halbach array.
Perform required imports#
Import pymotorcad to access Motor-CAD. Import draw_objects to plot figures of geometry
objects.
Import os, shutil, sys, and tempfile
to open and save a temporary .mot file if none is open.
import os
import shutil
import sys
import tempfile

import ansys.motorcad.core as pymotorcad
from ansys.motorcad.core.geometry_drawing import draw_objects
Connect to Motor-CAD#
If this script is loaded into the Adaptive Templates file in Motor-CAD, the current Motor-CAD instance is used.
If the script is run externally, these actions occur:
open a new Motor-CAD instance,
load the a1 SPM motor template,
set the Rotor Type to Surface Radial,
set the Magnet Arc [ED] to 180 EDeg,
set the Magnet Segments to 5,
set the Magnetization type to Halbach,
set the Halbach Magnetization type to Sinusoidal Array,
save the file to a temporary folder.
To keep a new Motor-CAD instance open after executing the script, use the
MotorCAD(keep_instance_open=True) option when opening the new instance. Alternatively, use the
MotorCAD() method, which closes the Motor-CAD instance after the script is executed.
if pymotorcad.is_running_in_internal_scripting():
    # Use existing Motor-CAD instance if possible
    mc = pymotorcad.MotorCAD(open_new_instance=False)
else:
    mc = pymotorcad.MotorCAD(keep_instance_open=True)
    # Disable popup messages
    mc.set_variable("MessageDisplayState", 2)
    if not "PYMOTORCAD_DOCS_BUILD" in os.environ:
        mc.set_visible(True)
    mc.load_template("a1")
    mc.set_variable("BPMRotor", 0)  # set Surface Radial rotor type
    mc.set_variable("Magnet_Arc_[ED]", 180)
    mc.set_variable("CircumferentialSegments", 5)
    mc.set_variable("Magnetization", 2)  # set Halbach magnetisation
    mc.set_variable("HalbachMagnetization", 1)  # set sinusoidal array

    # Open relevant file
    working_folder = os.path.join(tempfile.gettempdir(), "adaptive_library")
    try:
        shutil.rmtree(working_folder)
    except:
        pass
    os.mkdir(working_folder)
    mot_name = "a1_SPM_Custom_Magnet_Angles"
    mc.save_to_file(working_folder + "/" + mot_name + ".mot")

# Reset geometry to default
mc.reset_adaptive_geometry()
Get required parameters and objects#
From Motor-CAD, get the required standard template parameter values and the adaptive parameters and their values.
Get the number of magnet segments, so you know how many custom magnet angles can be set.
magnet_segments = int(mc.get_variable("CircumferentialSegments"))
Get the magnet regions and add them to the magnets list.:
magnets = []
for i in range(magnet_segments):
    magnets.append(mc.get_region(f"{i+1}Magnet1"))
This example is designed for halbach magnet arrays, where the rotor has an odd number of magnet
segments. The central magnet angle remains unchanged. Custom magnet angles are defined for outer
magnet segments, such that symmetric pairs have symmetric magnet angles. Use the
draw_objects method to visualise the rotor and magnets with labels.
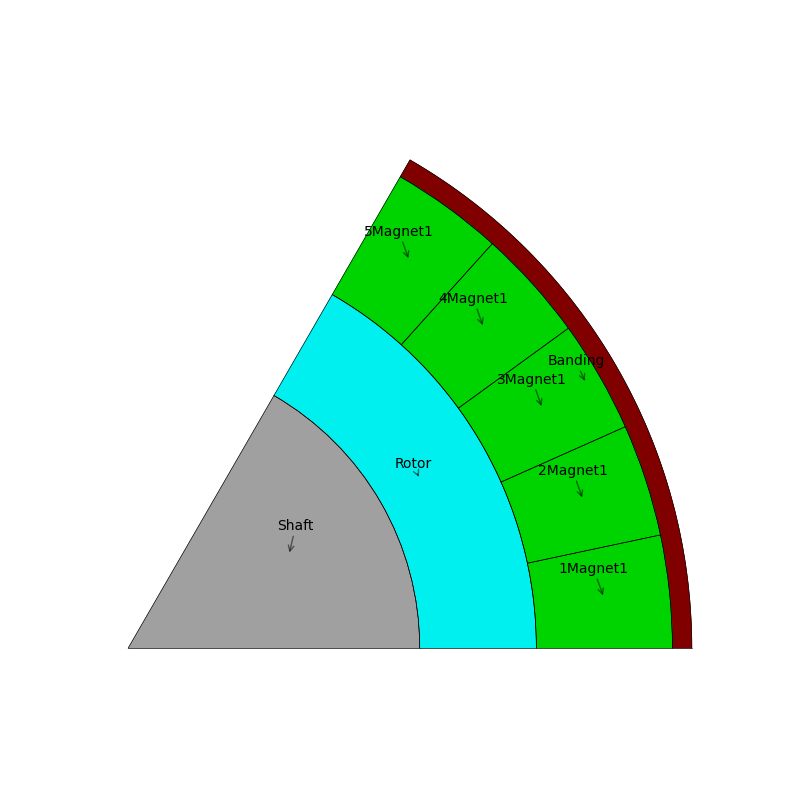
When there are 5 magnet segments, the magnet angles for 5Magnet1 and 1Magnet1 will be
symmetric, and the magnet angles for 4Magnet1 and 2Magnet1 will be symmetric.
This example sets custom magnet angles for the outer pairs of magnet segments. For every pair of
magnet segments, an adaptive parameter Magnet angle offset x is used to define how many
degrees to shift the angle by. Magnet angle offset 1 is for the outermost pair of magnet
segments (5Magnet1 and 1Magnet1 in this example).
Use the set_adaptive_parameter_default method to set the required Magnet angle offset
parameters if undefined. The number of adaptive parameters required is half the number of outer
magnet segments (for 5 magnet segments, this would be 2). Set the default offset values
to 10 ° for all pairs of magnet segments.
Use the get_adaptive_parameter_value method to add the adaptive parameters to the
magnet_angle_offset_values list.
magnet_angle_offset_values = []
half_outer_segments = int((magnet_segments - 1) / 2)
for i in range(half_outer_segments):
    mc.set_adaptive_parameter_default(f"Magnet angle offset {i+1}", 10)
    magnet_angle_offset_values.append(mc.get_adaptive_parameter_value(f"Magnet angle offset {i+1}"))
Create the Adaptive Templates geometry#
Set the magnet_angle property of the magnet segment regions to change the magnet angles. Loop
through the pairs of magnet segments, and add the corresponding magnet_angle_offset_values
to the original magnet angle for magnet segments on the left hand side of the rotor (for example
5Magnet1, which is magnets[-1], the last element of the magnets list). Subtract the
offset value for magnet segments of the right hand side of the rotor (for example 1Magnet1,
which is magnets[0], the first element of the magnets list).
Once the magnet angle has been modified, set the magnet segment regions using the set_region
method.
for i in range(half_outer_segments):
    magnets[i].magnet_angle -= magnet_angle_offset_values[i]
    magnets[-(i + 1)].magnet_angle += magnet_angle_offset_values[i]
    mc.set_region(magnets[i])
    mc.set_region(magnets[-(i + 1)])
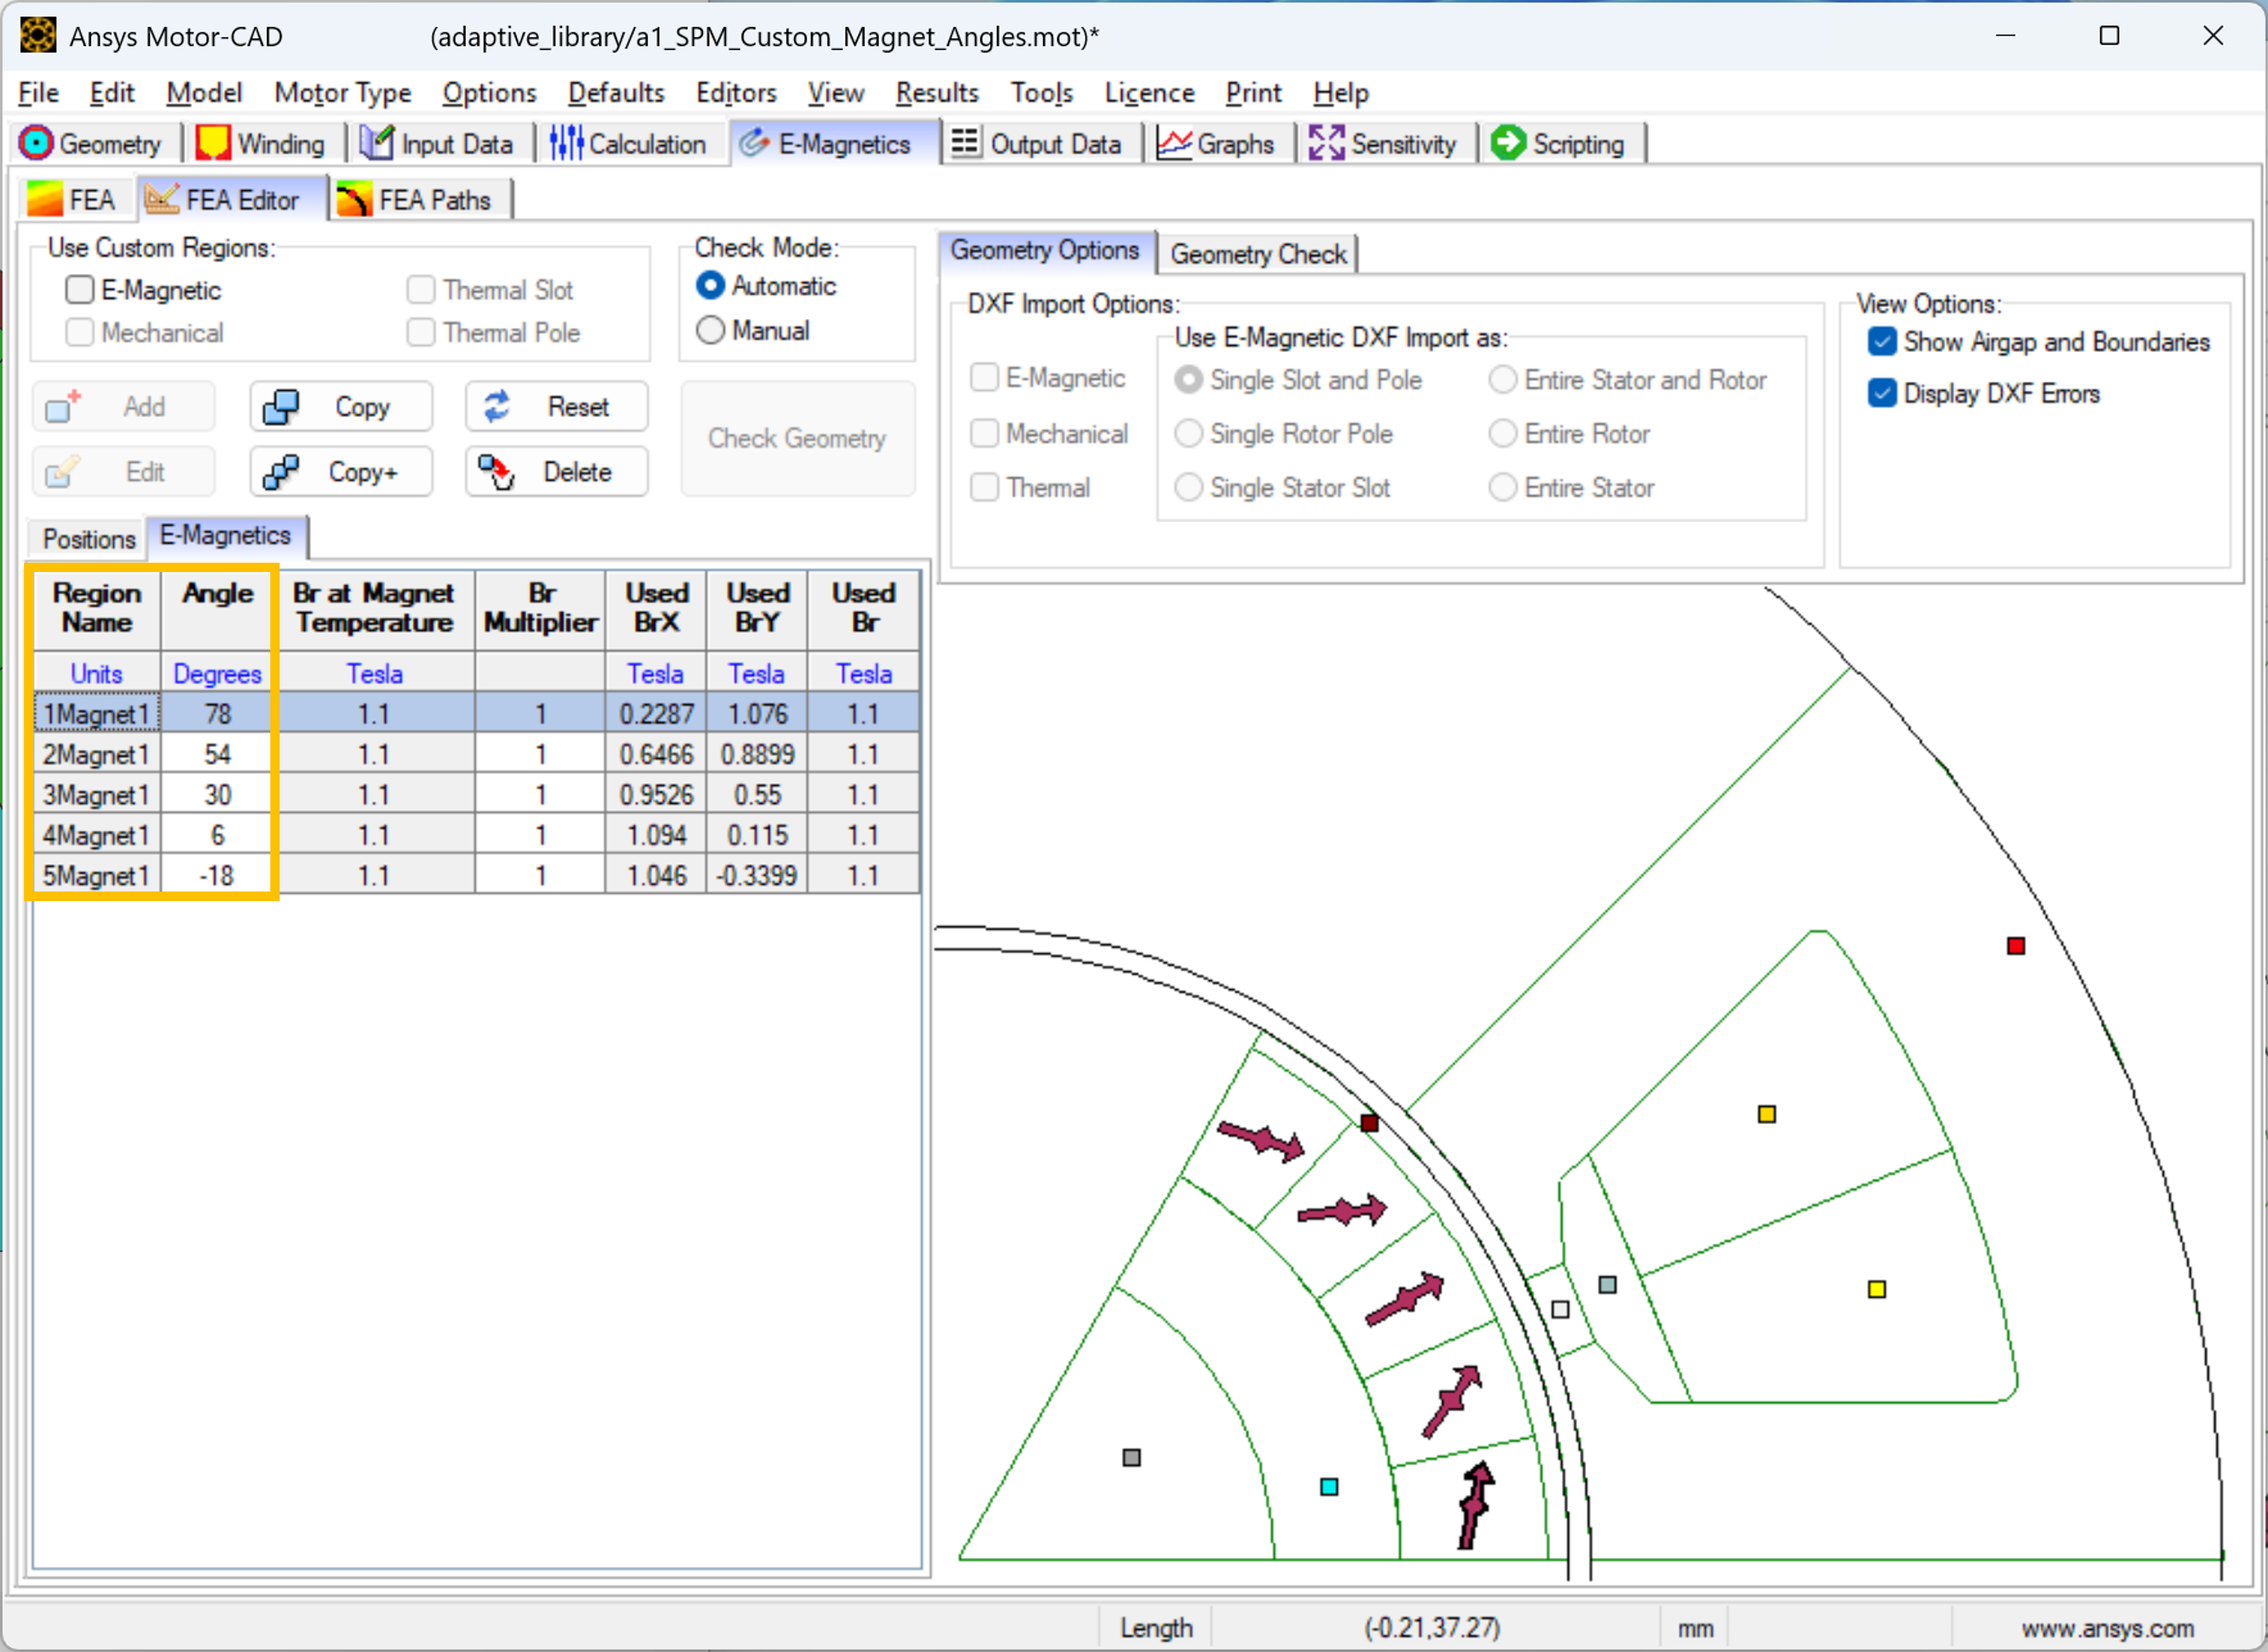
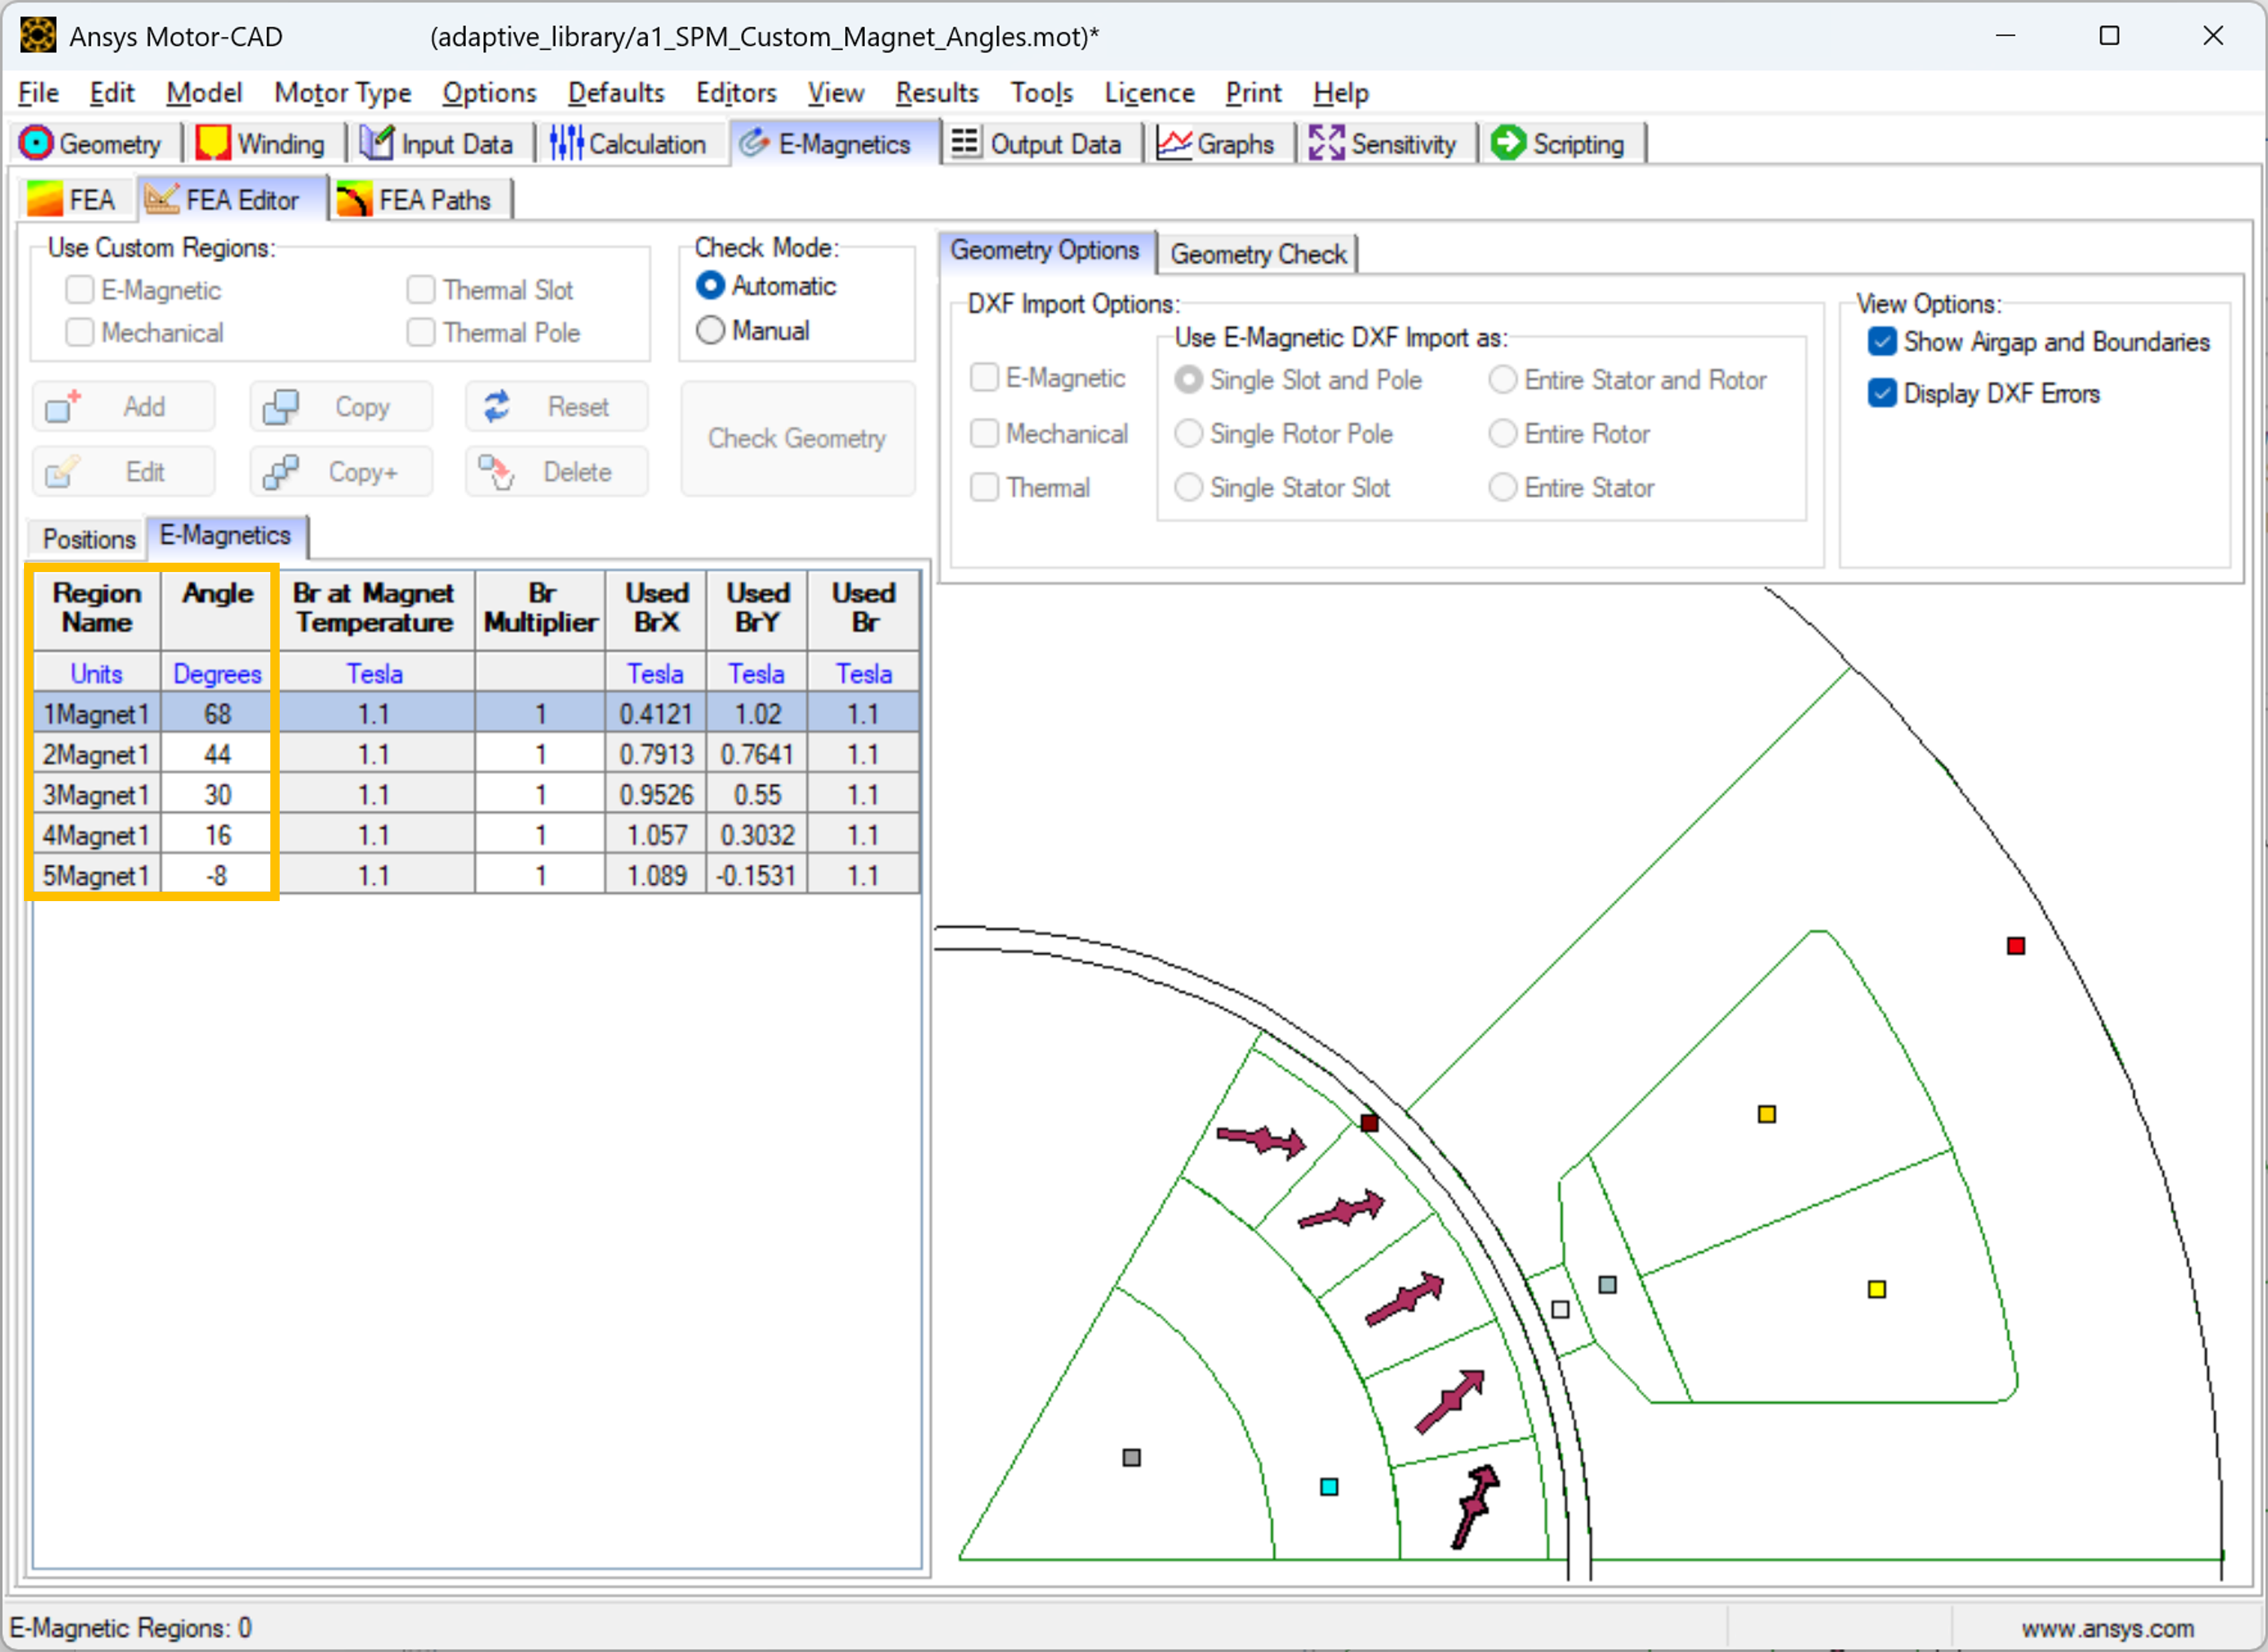
Go to the E-Magnetics -> FEA Editor tab to see the updated magnet angles.
Load in Adaptive Templates script if required#
When this script is run externally, the script executes the following:
Set Geometry type to Adaptive.
Load the script into the Adaptive Templates tab.
Go to the Geometry -> Radial tab to run the Adaptive Templates script and display the new geometry.
Note
When running in a Jupyter Notebook, you must provide the path for the Adaptive Templates script
(PY file) instead of sys.argv[0] when using the load_adaptive_script() method.
if not pymotorcad.is_running_in_internal_scripting():
    mc.set_variable("GeometryTemplateType", 1)
    mc.load_adaptive_script(sys.argv[0])
    mc.display_screen("Geometry;Radial")
Total running time of the script: (0 minutes 20.257 seconds)